Gallery of Lights
Here you can see selfmade lights and details, I made pictures of toget ideas. Unfortunately I had only a small compact camera available most of the times, so the quality of the pictures is only modest.
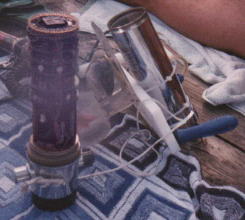
 1996,reedcontact
switch, pressure pipe with glued endpieces,charging over 2sockets from
the outside, handle will follow, light bulb with reflectorbehind a glass
disc, Gel-Pb batteries
1996,reedcontact
switch, pressure pipe with glued endpieces,charging over 2sockets from
the outside, handle will follow, light bulb with reflectorbehind a glass
disc, Gel-Pb batteries
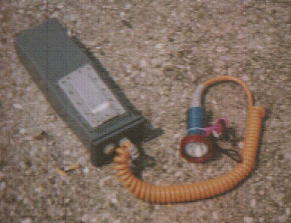 ca.1993,
Battery container of steel(!)sheets which could be hung up the tankstrap,flat
sealing, torch machined from Alu, reedcontact switch with a ring aroundthe
torch, Pb-Gel-batteries
ca.1993,
Battery container of steel(!)sheets which could be hung up the tankstrap,flat
sealing, torch machined from Alu, reedcontact switch with a ring aroundthe
torch, Pb-Gel-batteries
 ca.1995,
plastic, machined thread, flat sealing, reedcontact switch, Pb-Gel-batteriy,lightbulb
with seperate reflector, handle of Alu
ca.1995,
plastic, machined thread, flat sealing, reedcontact switch, Pb-Gel-batteriy,lightbulb
with seperate reflector, handle of Alu
 May
97, plastic, an O-ring in a recess in the cap as sealing, which is pressedagainst
the tube. A sealed axle triggers the switch. The clamps press thecapagainst
the body. The exact tension is determined by the distance piecesbelow the
clamp counterparts. The clamps are secured by a rubber ring.Pb-Gel-battery
and halogen-reflector bulbs. Glass pane, above a plasticring which presses
the glass with bolts against an O-ring.
May
97, plastic, an O-ring in a recess in the cap as sealing, which is pressedagainst
the tube. A sealed axle triggers the switch. The clamps press thecapagainst
the body. The exact tension is determined by the distance piecesbelow the
clamp counterparts. The clamps are secured by a rubber ring.Pb-Gel-battery
and halogen-reflector bulbs. Glass pane, above a plasticring which presses
the glass with bolts against an O-ring.
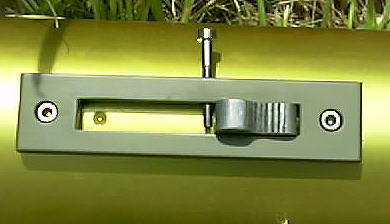
Oct. 1997, once again water tubing. A metal bar mounted with two bolts as handle. Bare switch in the water, cable sealed. At the first test (without electrics) the much too thin (2-3mm) front glass broke.

Oct. 1997, a light made of stainless steel, welded, lathed
Oct. 1997, professionell solution, built in series and sold by Classic-Dive/München , Alu, email for address
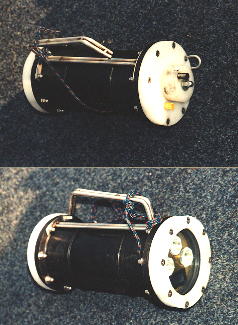
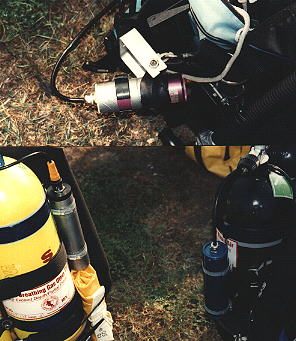
 August97,
the light head is bought from Hartenberger, the tank selfmade. I gotit
in my hands, because I had to reassemble the electric system. Two longwater
pipes hold the accus (each 5x 7Ah). The cable go through the fourT-formed
pieces.
August97,
the light head is bought from Hartenberger, the tank selfmade. I gotit
in my hands, because I had to reassemble the electric system. Two longwater
pipes hold the accus (each 5x 7Ah). The cable go through the fourT-formed
pieces.
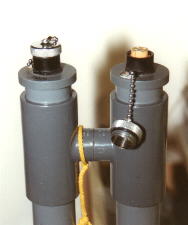
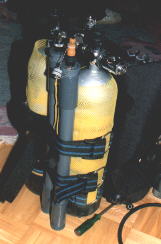 At
the lower side two blind plugs with 2 O-rings each, which are hold in place
by a a small bolt through the outer tube. Two sockets are mounted into
the upper plugs to connect the lighthead and the charging cable. A small
electronic prevents deep discharge.
At
the lower side two blind plugs with 2 O-rings each, which are hold in place
by a a small bolt through the outer tube. Two sockets are mounted into
the upper plugs to connect the lighthead and the charging cable. A small
electronic prevents deep discharge.

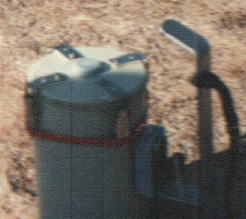
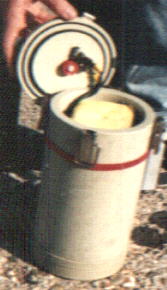
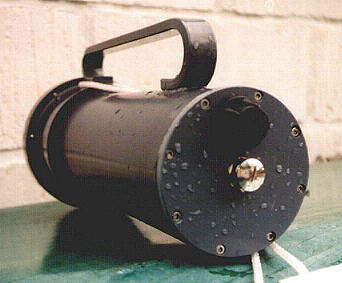
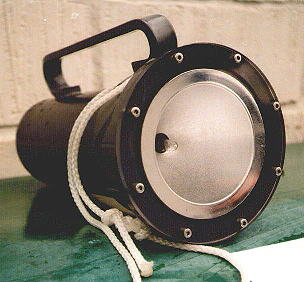
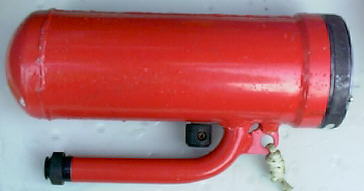
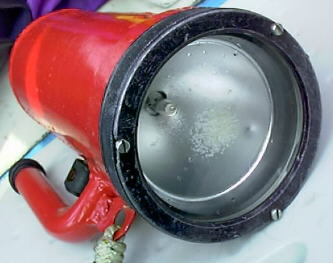
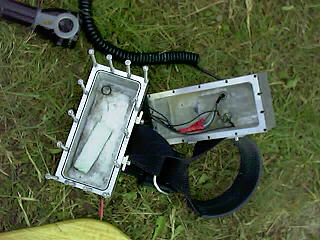 September97, the
canister is made of two aluminium parts which are machined out of the whole
material. A lot of bolts hold the parts together and an O-ring makes the
sealing. The jacket belt is lead under the metal sheets at thefront side.
The cable is sealed with feed throughs without plugs. Charging is done
through a hole which is sealed with a blind plug. But don't use a plastic
plug, because it deformates under pressure and the seal brakes.
September97, the
canister is made of two aluminium parts which are machined out of the whole
material. A lot of bolts hold the parts together and an O-ring makes the
sealing. The jacket belt is lead under the metal sheets at thefront side.
The cable is sealed with feed throughs without plugs. Charging is done
through a hole which is sealed with a blind plug. But don't use a plastic
plug, because it deformates under pressure and the seal brakes.
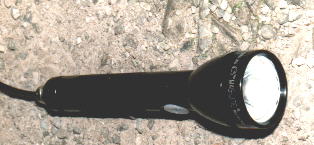
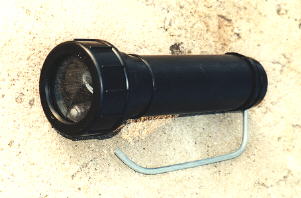
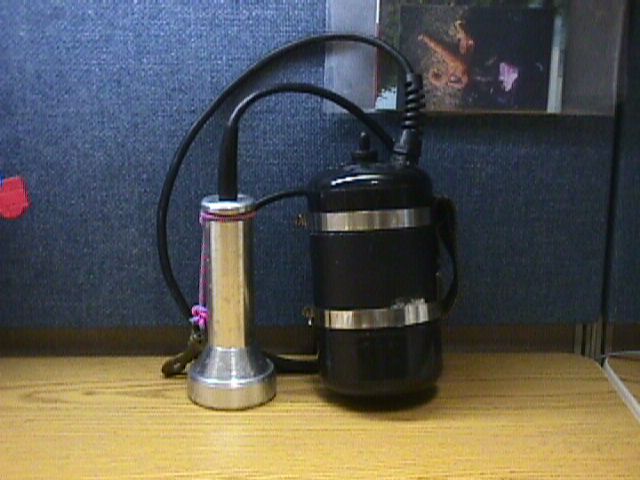
A Maglite light (2 monocells) is modified as a lighthead. The switch
is removed and the hole is sealed with a champagne cork :-) The plasticlense
is changed against one of glass 4mm thick. Turning the front cap toggles
the switch. A microswitch is pressed by a metal plate mounted to the front
cap. There is the right space for a 51mm halogen reflector bulb.
May 1998, Alu, Reedcontacts, back cap welded
Another larger picture of the switch. There is a magnet and a spring
with ball as notch in the moving part. The bolt is a switch on security.
Two pictures by Andreas Huss, July 1998, builder unknown.
PVC-parts, lead acid gel-accus, parts from Devpein
Dennis L. Block built this light. Here is what he wrote in rec.scuba.equipment:
After my encounter at Seacrest with a sixgil shark seemingly in hunting
mode, I completed a dive light project I'd been working on for a couple
of years.
It all started when I found a Do It Yourself (DIY) dive gear webpage on
the internet (this page :-). I decided to make one of the "Portable
Sun" canister dive lights described by Roger Lacasse at: (down)
.
I printed the plans, modified them a little to suit my needs, and purchased
some 3 inch diameter 6061-t6 aluminum round stock at Everett Steel. I purchased
some 1/4 inch thick tempered glass from a local glazier, who ground it
in approximately the right shape for me (not many local shops easily grind
a 2.5 inch diameter circle). My Father in Law and I machined a lighthead
using his lathe while I visited one Christmas holiday. I purchased the
switch, power chord, wiring, connectors, MR16 halogen bulb (includes reflector),
and material to encase the battery at Eagle Hardware. I used Heyco fluid
tight connectors to seal the power chord, and a DACOR rubber switch boot
to seal my toggle switch. I purchased both a 12V3Ah and a 12V7Ah lead acid
gel cell battery from Pacific Power Batteries, in Everett. The related
picture shows the cannister for the 12V3Ah battery.
The case for the battery is just schedule 40 PVC endcaps and a coupler.
One endcap is glued to the coupler using ABS glue. The inside of the free
end of the coupler was machined on my router to match the machined end
of the free endcap. The intent here is to seal the battery case with an
O-ring, then latch the whole assembly closed using stainless latches (which
I have yet to purchase).
For Saturday's test, I sealed the assembly with household Silicon caulk.
I rigged a belt loop with some old webbing and a couple of pipe clamps,
which held everything nicely on my BC belt webbing. The canister was pushed
back against my backplate and held in position by my belt buckle. This
position took a little getting used to when trying to switch the light
on and off, but was never in the way when I kicked out to the dive site,
or while finning around underwater. As soon as we descended (in about 35
feet of water), my buddy inspected all the canister connections for leaks.
We then tested the light. The first thing we noticed was the switch didn't
want to stay on. I think this is due to the water pressure acting on the
switch cover - pushing the toggle away from the contacts, something I still
need to iron out. The 50W bulb lit the bottom beautifully! The light was
so bright that I had to make sure I didn't hold it directly in front of
me as the back scatter shone intensely, distracting me somewhat.
We stopped every 10 feet to check the connections and test the light. The
whole assembly remained intact all the way to 110 feet where we had agreed
to turn our dive. I think this disappointed my buddy somewhat as he kept
mentioning looking forward to an impressive implosion... I am very satisfied
with the performance of the light. Once I figure the switching problem
out, I plan on making a modified version for my video camera.
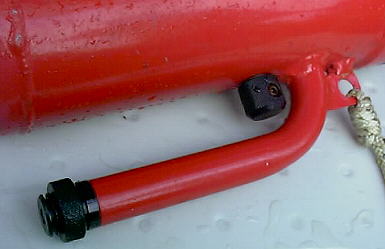
Autumn 2000, Light made of metal (?) welded, charging jack at handle
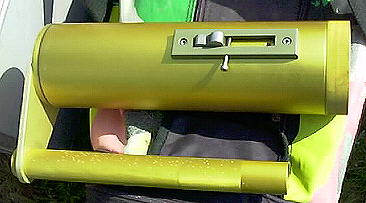
And now for something completly different:
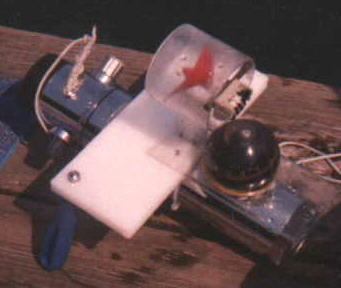
The round shining tube looking like a Thermos, contains a sonar. The transducer is at the side with the two knobs. At the other side there is the display. A number for the distance and string of LEDs for other echoes. Not good to recognize the electronics are on the round PCBs which are mounted above each other.
This device was built to receive a degree in electric engineering in the 70th(!) by a student. CMOS chips were quite new that time ! This former student is member of my diving club and teaches now at the Technical University of Graz.
The big globe is a compass and the red propeller drives a counter to measure the distance while swimming. This aparatus was used for orientation diving.
When I have to much time somedays more will follow.