Scuba - do it yourself , simple projects
Content:
- Ribonrope
- Weightbelt buckle- flexible
- Protection helmet
- Fixings at the tank
- BC-extensions
- Watch/Computerband
- Masklight
- Writing board
- Bag for accessories
- Computer display protection
- drying rack
- tank fixing
- back to Homepage
Only "small" projects will be described here. Nobody can expect to find an instruction for building a regulator. Though you can construct a lot with a small sortiment of tools. Most of the tools used can be found at better equiped homeworkers. I although could use an old lathe from time to time. The works described here may seem rude or primitive to professionals, but this is more dedicated to the interested homeworker. Any correction or advice is desired.
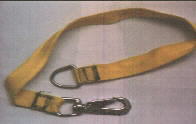
Ribonrope with hook
 To
easy up the handling of the reel, I made a small extension. Of course a
rope with knots would do fine, but the ribonrope is less problematic to
handle. Lay a piece of strap around a D-ring and sew it. The same thing
happens to the other end and a carabiner. I like a length of 50cm.
To
easy up the handling of the reel, I made a small extension. Of course a
rope with knots would do fine, but the ribonrope is less problematic to
handle. Lay a piece of strap around a D-ring and sew it. The same thing
happens to the other end and a carabiner. I like a length of 50cm.
back to start
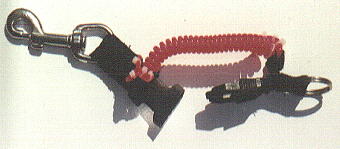
Weightbelt buckle - flexible
Everyone knows the problem, if you go deeper with a neopren suit, the weight belt comes loose and you have to tighten it. To handle that there are stainless steel buckles with a spring. But the price is quite high (~350ATS). So here are two ways for doing it yourself:
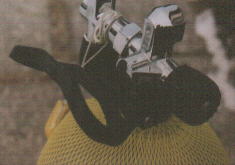
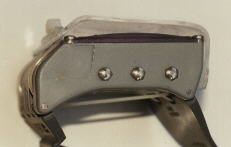
a) metal springs:
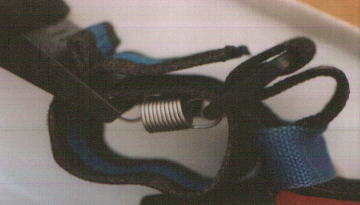
Take a plastic buckle and drill 3 holes into the part for the belt. The stainless steel spring are fastened there. The other end of the springs are fixed at a part as seen in the picture the same way. A belt webbing lays around the springs. It creates a maximum extension and a security if something goes wrong with the springs.
To protect the suit, put a rubber band around the springs and sew it.
 b)
rubber band: buckle and second part are connected by a solid webbing.
Put 2 to 3 rubber bands around that webbing as elastic element.
b)
rubber band: buckle and second part are connected by a solid webbing.
Put 2 to 3 rubber bands around that webbing as elastic element.
Protection helmet
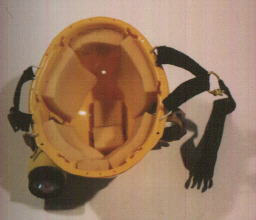
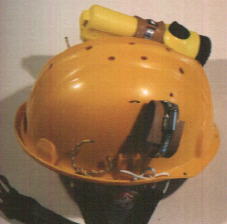 I
saw the first protection helmet for divers 1991 when preparing for a wreck
dive. It was clear, I need one !!! Helmets for climbing and canoeing would
be a good solution but also a rather expensive one (>600ATS). So I bought
a cheap one for building workers for about 120ATS. The peak was cut away,
because it is useless. The inner frame went the same way. I glued pieces
of foam into the helmet for a good fit. Normally there is no chin strap
but you can add one as seen on the pictures.
I
saw the first protection helmet for divers 1991 when preparing for a wreck
dive. It was clear, I need one !!! Helmets for climbing and canoeing would
be a good solution but also a rather expensive one (>600ATS). So I bought
a cheap one for building workers for about 120ATS. The peak was cut away,
because it is useless. The inner frame went the same way. I glued pieces
of foam into the helmet for a good fit. Normally there is no chin strap
but you can add one as seen on the pictures.
The mounting of the lights depends on there shape. The easiest way is to lead a steel collar through holes in the helmet and around the light. Rubber straps protect the lights against scratches.
 I
added two metal plates with holes, because the soft plastic wouldn't stand
for long. The collars would pull through the plastic. Before fixing the
hole position you should test the beam direction. The best position is
at about 45° when seen from the front, if you don't want to get entangled
somewhere. It is important to drill some holes into the top of the helmet,
so that the air can flow out. The helmet is especially useful if you use
a drysuit with a latex hood !
I
added two metal plates with holes, because the soft plastic wouldn't stand
for long. The collars would pull through the plastic. Before fixing the
hole position you should test the beam direction. The best position is
at about 45° when seen from the front, if you don't want to get entangled
somewhere. It is important to drill some holes into the top of the helmet,
so that the air can flow out. The helmet is especially useful if you use
a drysuit with a latex hood !
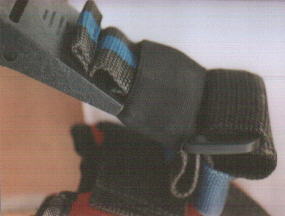
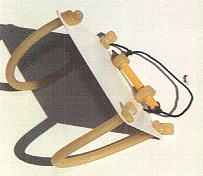
Fixings at the tank
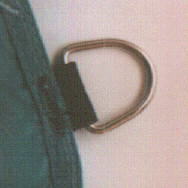
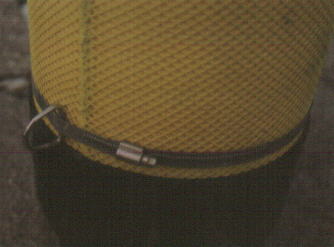 A
method of fixing something at the tank is easy to append. Just take a long
stainless steel collar (perhaps two) and mount it around the tank. Lead
it through 2 D-rings before that, putting them on opposite sides of the
tank. Such a kind of mounting is necessary anyhow for stage and pony-bottles
to fix them to the jacket.
A
method of fixing something at the tank is easy to append. Just take a long
stainless steel collar (perhaps two) and mount it around the tank. Lead
it through 2 D-rings before that, putting them on opposite sides of the
tank. Such a kind of mounting is necessary anyhow for stage and pony-bottles
to fix them to the jacket.
 On
this occasion I want to recommend everyone to use a handle at the tank.
These gadgets are cheap (100-200ATS) and help a lot.
On
this occasion I want to recommend everyone to use a handle at the tank.
These gadgets are cheap (100-200ATS) and help a lot.
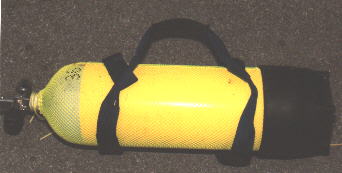 This
is an option for carrying a (long) tank more comfortable. Take a belt 40mm
wide and about 180cm long and put pieces of bicycle tubing (40cm) onto
the endings. Lay small loops around the belt at the endings and sew them.
I added another part of belt in the middle to improve comfort.
This
is an option for carrying a (long) tank more comfortable. Take a belt 40mm
wide and about 180cm long and put pieces of bicycle tubing (40cm) onto
the endings. Lay small loops around the belt at the endings and sew them.
I added another part of belt in the middle to improve comfort.
BC-extensions
 Most
novice jackets don't have many possibilities to attach something.
Most
novice jackets don't have many possibilities to attach something.
If you don't want to switch to a tec-jacket, there are still some options.
You can get D-rings at some dive-shops and at marine stores. With some
belt webbing you can fix them at many places at the jacket. Just be careful
not to damage the bladder.
 Loops
inside the pockets are useful to fasten the equipement.
Loops
inside the pockets are useful to fasten the equipement.
At these URLs divers, mainly cave divers describe how to put together a wing-style jacket on your own.
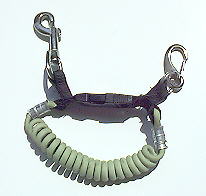
Watch/Computerband
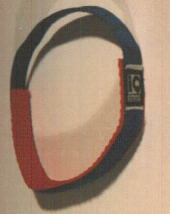
 Many
watchbands are just too short, if you wear a drysuit with thick underwear.
One solution are the bands from IQ-Systems, but I couldn't get one round
here when I needed it. So I made one on my own as they are not very complicated.
Many
watchbands are just too short, if you wear a drysuit with thick underwear.
One solution are the bands from IQ-Systems, but I couldn't get one round
here when I needed it. So I made one on my own as they are not very complicated.
Sew the rough part of the velcro onto a webbing 175mm long and 20mm
wide, then at the end a soft velcro about 220mm long. This part threads
through the rods of the watch. Let it first be longer. After the first
use cut it to the necessary length. To compensate for differences in circumference
because of ascending pressure you can add a part (3cm) of rubber band.
If somebody has problems with the short wrist band of a Beuchat/Cochran
divecomputer, there is a solution.Henrik
Carlsen made a plan how to construct a band similar to the upper in
Adobe PDF-format. Ask him or me if necessary.
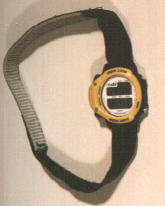
 I
also like the Scuba Chrono by SWATCH. But its watchband is much to short.
At least for my model there was no loner one, because SWATCH has a special
kind of fixing. To use it though I got an original replacement watchband
and cut the part with the buckle in a way, that it fits into the existing
buckle. So I won some cm.
I
also like the Scuba Chrono by SWATCH. But its watchband is much to short.
At least for my model there was no loner one, because SWATCH has a special
kind of fixing. To use it though I got an original replacement watchband
and cut the part with the buckle in a way, that it fits into the existing
buckle. So I won some cm.
Masklight
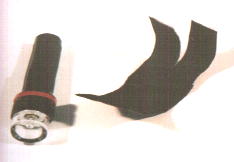
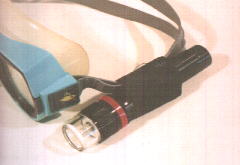 Sometimes it can be useful to mount a small light directly to the mask
strap. Some lights have such a possibility, but you can add one to the
cheap ones, if they have a longish aperture at the side.
Sometimes it can be useful to mount a small light directly to the mask
strap. Some lights have such a possibility, but you can add one to the
cheap ones, if they have a longish aperture at the side.
Take a broad velcro and sew the two different parts. Cut the hard part for some centimeters and put one half through the aperture at the light. Then lay the light at the mask strap and put the velcro around the strap and the light to fix it.
Such a light is not very bright, but it's enough to read a computer.
Writing board
Writing boards can be useful from time to time. Besides you can save some money when doing it on your own and making your own design.
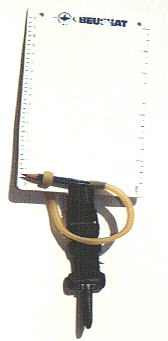 This
writing board had some lines fixed at it and a pen, when I bought it. Unfortunately
these lines were totally unpractical. They got mixed up or got loose (one
dive even twice!).
This
writing board had some lines fixed at it and a pen, when I bought it. Unfortunately
these lines were totally unpractical. They got mixed up or got loose (one
dive even twice!).
So I made a few changes oriented by a commercial model. The lines were removed. Instead I cut a longish hole into the plate and lead a strap through with a Fastex buckle. The other part of the buckle is connected to a plastic snap bolt by another strap. So you can take away the board quickly. This kind of attachment is available readily in a lot of combinations.
The pen is fixed by a piece of surgical tubing. You drill two holes
into the board, just large enough to put the tubing through. The tubing
forms a loop which holds the pen. Another fixation of the tubing isn't
necessary if the holes are small enough.
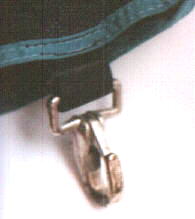
 The
snap part is nearly the same here. But a piece of rubber line is sewn at
the end of the strap. It is then lead through a hole in the ready writing
pad.
The
snap part is nearly the same here. But a piece of rubber line is sewn at
the end of the strap. It is then lead through a hole in the ready writing
pad.
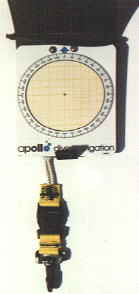
 The
basic part is a piece of plastic plate. An erasable magnetic writing pad
from a toy shop is fixed upon it. (e.g. "Magic Doodle", messages
in a newsgroup tell that it withstands the water pressure; commercial models
are made from the same parts.) I drilled 4 holes at the outside (don't
destroy anything !) of the writing pad and connected both boards with cable
ties. The magnetic pen and the pencil are hold together by a piece of surgical
tubing. A piece of string secures them. Further short pieces of tubing
loops hold the pens. The connection to the bolt snap is the same as with
the first model. I added a spiral cord from a children key holder. The
endings are only lead through the strap loops and fixed with two cable
ties.
The
basic part is a piece of plastic plate. An erasable magnetic writing pad
from a toy shop is fixed upon it. (e.g. "Magic Doodle", messages
in a newsgroup tell that it withstands the water pressure; commercial models
are made from the same parts.) I drilled 4 holes at the outside (don't
destroy anything !) of the writing pad and connected both boards with cable
ties. The magnetic pen and the pencil are hold together by a piece of surgical
tubing. A piece of string secures them. Further short pieces of tubing
loops hold the pens. The connection to the bolt snap is the same as with
the first model. I added a spiral cord from a children key holder. The
endings are only lead through the strap loops and fixed with two cable
ties.
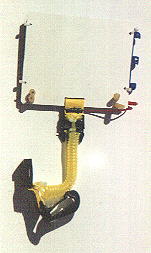
 I've
seen this version at technical divers. A flexible plastic plate gets 4
holes. Pieces of tubing are lead through the holes and secured with cable
ties. Two short loops hold the pencil. The assembly is slipped over the
arm.
I've
seen this version at technical divers. A flexible plastic plate gets 4
holes. Pieces of tubing are lead through the holes and secured with cable
ties. Two short loops hold the pencil. The assembly is slipped over the
arm.
 And
now something similar - a securing line for accessories e.g. a diving light.
It's the same principle as above, only now there is a third loop through
which the spiral cord is lead. I made two loops and fixed it with 4 cable
ties. Although being only a cheap spiral cord, it holds 6kg without problems.
And
now something similar - a securing line for accessories e.g. a diving light.
It's the same principle as above, only now there is a third loop through
which the spiral cord is lead. I made two loops and fixed it with 4 cable
ties. Although being only a cheap spiral cord, it holds 6kg without problems.
Here is another more rugged version. The rope is spiral cable which
normally connects computer keyboards. You can get them cheap at some electronics
shops. A pressed clamp for steal cable holds the loop.
Bag for accessories
 I
added this because space in BC pockets is mostly rare. It's a net bag that
can be tied up. I added a string at the lower side. You can't reach the
bag during the dive, but it is used for tools only needed at the surface:
emergency buoy, signalling device...
I
added this because space in BC pockets is mostly rare. It's a net bag that
can be tied up. I added a string at the lower side. You can't reach the
bag during the dive, but it is used for tools only needed at the surface:
emergency buoy, signalling device...

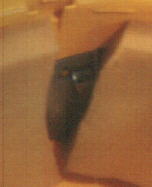
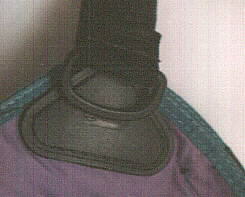
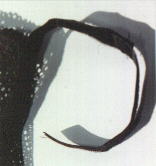 The
bag is fixed by velcro. A piece of the soft and hard part of velcro is
sewn together and at the upper and lower part of the bag (detail). Lay
the velcro around the tank straps or the straps which hold the bladder
at the backplate.
The
bag is fixed by velcro. A piece of the soft and hard part of velcro is
sewn together and at the upper and lower part of the bag (detail). Lay
the velcro around the tank straps or the straps which hold the bladder
at the backplate.
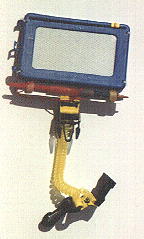
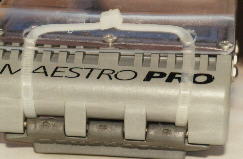
Computer display protection
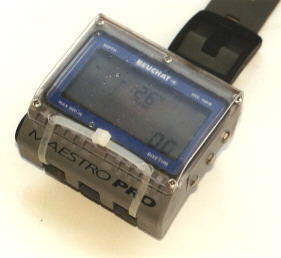 I
couldn't get a display protector for my computer (Beuchat Maestro Pro),
so I made my own one.
I
couldn't get a display protector for my computer (Beuchat Maestro Pro),
so I made my own one.
I took a piece of transparent plastics (e.g. Persplex) and cut it in
a way that it is aligned at the sides and gets over at the upper and lower
sides. These parts are carefully warmed with a hot air source and bent
with the help of a piece of wood. It should fit well over the computer.
 Make
two holes in each bent part. Now lead two cable ties through the fixation
of the bracelet. They lay against the underside of the computer. The lock
parts go through the holes in the plastic part and will be closed at the
upper side.
Make
two holes in each bent part. Now lead two cable ties through the fixation
of the bracelet. They lay against the underside of the computer. The lock
parts go through the holes in the plastic part and will be closed at the
upper side.
You can get the plastic especially cheap. There are price signs at big
markets made from exactly the right material. They have enough damaged
ones which are still useful as a resource.
Drying rack
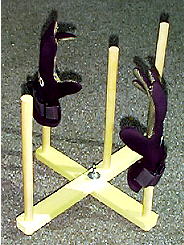
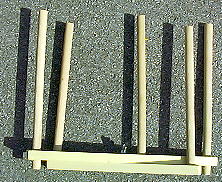
With such a rack it is much easier to dry gloves and shoes. I saw such a thing some years ago, but now I built my own one.
You can vary the lengths and pole count as you wish. 5 places seemed OK to me. A bolt with wing nut holds the two pieces together. The poles are fixed with wood glue, the two outermost ones got bolts, too. There is a special drilling insert for big holes in wood, that you can adjust from 10-40mm. My rack has no paint on it right now, but it would be better if it gets wet.
Tank fixing in the car
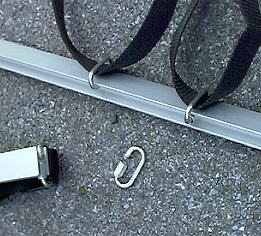
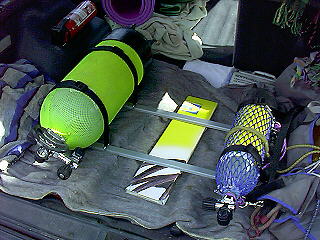
My tanks used to move in the empty car, so I made this simple fixation.
Two alu H-profiles are the basis. Two chain locks are used for each
strap and put at the profile. The strap goes in two layers. I made own
straps but the usual ones from the car shop will do fine. Rectangular pieces
which get stuck would be better.
back to start | ribon rope | weightbelt buckle- flexible | protection helmet | fixings at the tank | BC-extensions | watch/computerband | masklight | Writing board | Bag for accessories | Computer display protection | drying rack | tank fixing | back to homepage
e-mail:bastel.stube@gmx.net