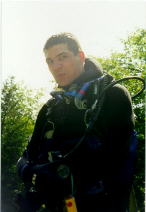
UW-Light of Roman
About the build !
I had the same reason to build an UW-torch as each other diver. To make it short the light was unfortunately not cheap.
At first I had to decide which material to use. I chose aluminium
because most nice, commercial, tekkie lights use it. That was only
possible, because I can do turning and have a lathe I can use. I also
made my thoughts about the electronics which should support all
possible features. Of course this thing should look good.
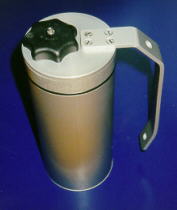 My
torch ist made from anodized aluminium. It uses a 12V/3,4Ah lead acid
battery and a 35W bulb. More power is possible. It has a 3step dimmer
and burns about 65min at full power. The dimmer steps can be set
individually. The charger was very cheap. The current can be adjusted.
At 1.3A it takes 4h for a full charge. I will integrate a small
voltmeter in the remaining space.
My
torch ist made from anodized aluminium. It uses a 12V/3,4Ah lead acid
battery and a 35W bulb. More power is possible. It has a 3step dimmer
and burns about 65min at full power. The dimmer steps can be set
individually. The charger was very cheap. The current can be adjusted.
At 1.3A it takes 4h for a full charge. I will integrate a small
voltmeter in the remaining space.
It is possible to use a different battery. A 12V/5Ah NiCd battery
will fit. It would have had benefits but was too expensive for the
first trial.
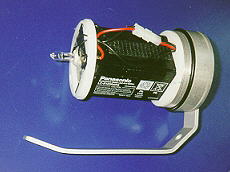
The switch is a magnetic type from DEV-Pein. The light also has a deep
discharge protection which will blink if the battery runs low. There is
also a (switch-on) current limiter and a leakage warner. The electronic
is from Reinhard's homepage. All features were combinded (dimmer, deep
discharge, leakage detector, current limiter). I use a mdeium reflector
with 30° - but now I think a 10° might have been better. Never
mind the reflector can be changed. It is locked with a plastic ring
inside the tube.
The battery is fixed with two plastic rings. One fits pressde
inside the cover. The other one centers the battery. The rings are
glued to the battery with hot-melt-adhesive. The bulb socket is pressed
into an aluminium part screwed to the battery and ring fitting exactly
inside the tube. This way the bulb is centered and protected by the
four bolts. The torch must be opened for charging. A watertight
charging plug (DEV-Pein) could be added later.
Plan: (click for a larger picture)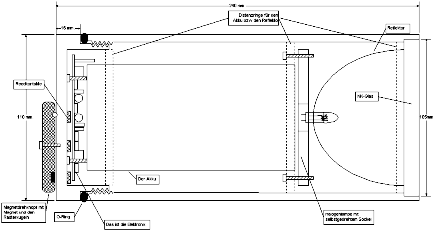
<>I needed a friend to turn the large thread because my lathe was too
small. He needed to use a commercial lathe and so it cost me €36. The
thread has 6 or 7 convolutions but 4 to 5 would be enough. The tube
could only be clamped for 5mm. The thin wall thickness and the large
forces made the problems. I could do the rest on my own or the cost for
the lamp would have been too high.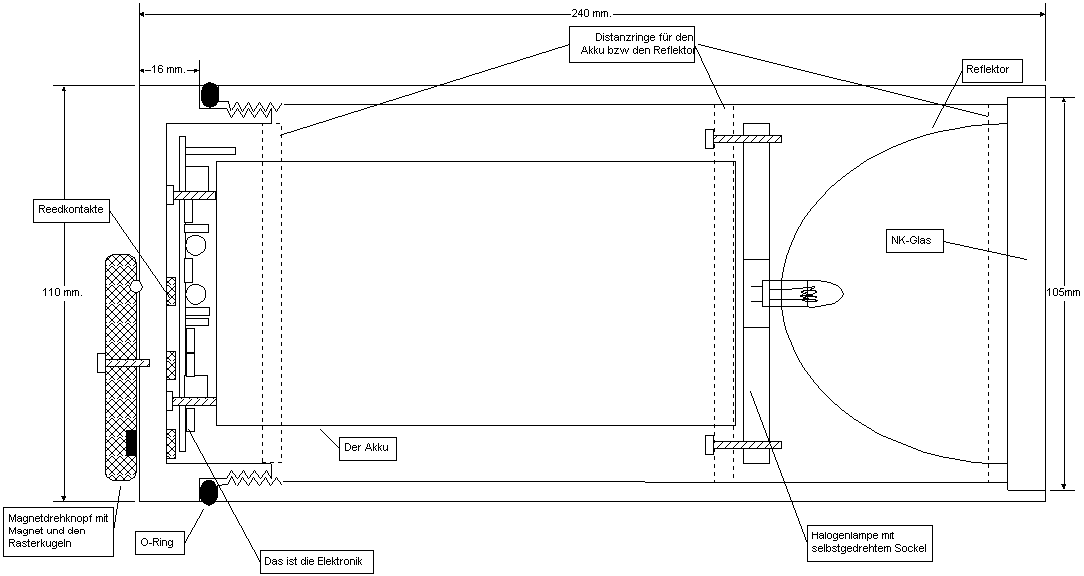
The step for the glass which is glued with silicone glue is adjusted for 0,2mm tolerance. The length of the finished tube is 225mm. The bottom cover has the same diameter as the tube and a length of 41mm. The removed inner part is 94mm in diameter at a depth of 34mm so 7mm of thickness remain. The reed contacts could be switched up to 12mm thickness.
I had problems finding the right reed contacts. In the end I used plastic sealed contacts (Conrad electronics) which are cheap and easy to glue. The magnetic button uses a small screw as transportation lock thus needing a screw driver. As alternative I made a custom screw from the grip of a screw driver. The handle is cut to length, drilled, the edges filed and then bent around a vise. The parts are anodized (3 days and €7).
The parts:
- 1 Alu tube 300x110mm 5mm thickness 100mm inner diameter
- 1 Alu rod 50mm long 110mm diameter
- 1 Alu bar 350x25x5mm
total cost for the aluminium €25.(+ a beer for the chief).
or at a shop €?
anodizing €7
turning of the thread
€35
Parts from DEV-Pein:
- 1 reflector Medium 113 (€11)
- 1 Natron calcium glass 105x10mm (€12)
- 1 magnetic knob MD-1 with magnet (€13,30)
- 1 Silicone glue (€6,40)
- 1 sliding paste (Silicone) for Alu (€3,50)
diverses:
- 1 lead acid battery 12V/3,4Ah (€29)
- 1 halogene bulb 12V 35W (€2,10)
- 1 bulb socket €5,-
- 1 O-Ring 100x5 um €4,15
- screws about €1,50
- 1 lead acid charger €26 (plus digital voltmeter €14,50)
Electronic parts €14,50.
Total: €220 could be done cheaper I think. For tests and defect parts there may be another €22-36 and a lot of work.
The torch is bigger than a commercial one, but that leaves space for spare parts in the inside (spare bulb, O-Ring, Silicone paste...)
Good luck for your projects !