Lightheads
I don't have all lights in use right now. The other ones are either under construction or just planned or will not be finished. These descriptions are not meant to be followed exactely but as inspiration for your own construction (mail me when finished !)
Here are the lightheads for the accumulators. I use lightheads with switches, but it is also possible to mount the switch at the accumulator casing. A light lighthead is more comfortable to use than a heavy light. My lightheads and accumulators can be combined nearly at will.
- 1st lighthead (of Plexiglas)
- 2nd lighthead (Devpein hand torch)
- 3rd lighthead (pressure tight canister)
- 4th lighthead (tubing, resin)
- 5th lighthead (Maglite) (still to come)
- 1st diving light (tubular light of PE)
- 2nd diving light (Plexiglas rectangular)
- 3rd diving light (Plexiglas, small, unfinished)
- 1st accumulator ("open" accu, contacts sealed)
- 2nd accumulator (very big canister)
- 3rd accumulator (big accu, sealed in resin)
- 4th accumulator (waste water tubing)
- 5th accumulator (hose material)
- 6th accumulator (plexiglas canister)
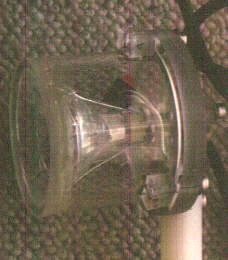
1st lighthead (of Plexiglas)
The next light came into existence by chance. I bought a piece of Plexiglas
tubing at the glazier without an intended use. Then I started thinking
what one could make from it. I cut a piece which could accommodate a reflector
bulb and smoothed the edges. A round piece of Plexiglas made the front
pane. I machined off a recess up to half the width. The edges were not
very smooth but that didn't matter because I glued the two pieces with
much 2-component-glue. As back cap I took a larger disc which got a groove
for an O-ring. This groove should be very smooth, so you will need to use
a lathe. Small pieces of Plexiglas are glued and bolted to the outside
of the tube. The bolts which hold the cap sealed are screwed into threads
in these pieces. The tube is pressed against the O-ring in the cap. To
prevent displacement there is another smaller diameter O-Ring around the
main one. Don't tighten the bolts to much. The water pressure will assure
the sealing when going deeper.
 The lamp holder is bolted to the cap. The relais or electronics are held
by the cables. The switch is a reed contact type again, which lays in a
recess at the inner side. It is effected by a magnet in a rectangular lever.
A thread and a bolt secure the switch during transportation. The notches
are realized as like light no. 1. I leveled a polyamid rod for some cm
and bolted it to the cap with some rubber between as a grip. A hole in
the grip takes a cord. The cable to the power supply finds its way to inner
part through a pressure tested feed through.
The lamp holder is bolted to the cap. The relais or electronics are held
by the cables. The switch is a reed contact type again, which lays in a
recess at the inner side. It is effected by a magnet in a rectangular lever.
A thread and a bolt secure the switch during transportation. The notches
are realized as like light no. 1. I leveled a polyamid rod for some cm
and bolted it to the cap with some rubber between as a grip. A hole in
the grip takes a cord. The cable to the power supply finds its way to inner
part through a pressure tested feed through.
These construction was successfully tested down to 70m too. Handling
is very comfortable, because the torch is lightweight, handy and positively
buoyant. One handed operation is possible. When making photos I carry it
with a strap secured to my wrist, so I can get it quickly if necessary.
The cable should be fastened in the back at the BC or tank. Just be careful
not to put the tank onto the cable because this will lead to a defect in
the long run. And especially the cable to the battery can't be changed
so easily. For me a 20W spot bulb will do which leads to a bit more than
an hour of burntime. Stronger bulbs are possible but have shorter burntime
because of the current/capacity characteristic of the lead-acid batteries
(35W-36min 50W-26min).
Start
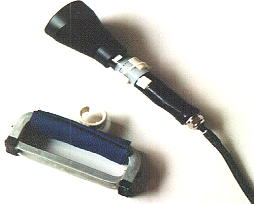
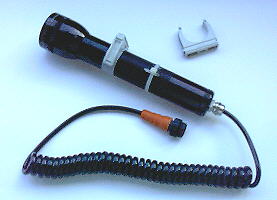
2nd lighthead (Devpein hand torch)
That
is a lighthead from Devpein. I added a drilled through plastic pole with
threads at both ends. A feed through is there for the cable. Half of a
feed through connects the pole to the lighthead. A reed contact is glued
to the inside. It is switched by a magnet that is fixed at the arc segment
which is normally used to hold a water pipe.
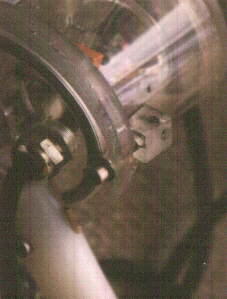
You can also see a handle that is used for example for cave diving.
You have the advantage that the hand can still grip something. The lighthead
is just put into the arc segment. The aluminium parts came from a hardware
store. They are used for flower case mountings. You can bent them easily
with a vice. The blue part is neopren to get a stronger fix of the hand.
Be careful ! With rising depth this neopren and that of the glove get thinner
and the hold loses.
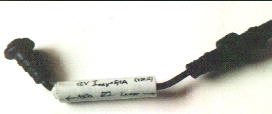 There
is only a small current reed contact inside the handle. To switch the high
current of the bulb I used an intermediate plug. Inside a plastic tube
is the electronic sealed in resin. That worked for two dives. It seems
as if the emitted warmth builds up and destroys something.
There
is only a small current reed contact inside the handle. To switch the high
current of the bulb I used an intermediate plug. Inside a plastic tube
is the electronic sealed in resin. That worked for two dives. It seems
as if the emitted warmth builds up and destroys something.
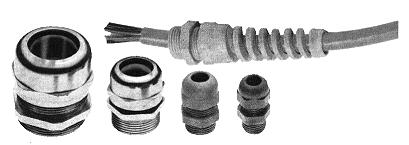
You can still see the black Bulgin plugs an some pictures. But I changed
all of them against KSS Plugs now, sold e.g. by Devpein.
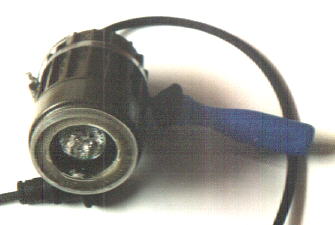
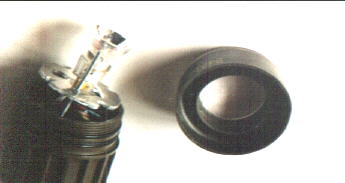
6th Light (watertight body, tubing)
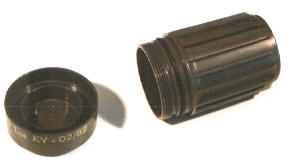 This
container will give me the light head. Perhaps somebody knows what it has
been for ? They were sold for only 10ATS in a hardware store. The cap has
an O-ring sealing and is good for 70m ! There is a writing on the outside
which leads me to the conclusion that it was in military use formerly.
This
container will give me the light head. Perhaps somebody knows what it has
been for ? They were sold for only 10ATS in a hardware store. The cap has
an O-ring sealing and is good for 70m ! There is a writing on the outside
which leads me to the conclusion that it was in military use formerly.
The
cap gets a hole and a Plexiglas pane is glued in with epoxy glue.
Two aluminium discs are connected by thread poles and serve as carriers for the bulb socket. I took a 20W/35mm halogen reflector bulb. For the first test there was only 1cm between bulb and front pane, which hasn't been enough. The pane was partially melted. Now I take 3cm, which is enough.

There is a feed through at the bottom for the cable and an O-ring sealed switch. The sealing isn't specified for pressure but did hold 45m.
The handle is taken from a file. The steel collar has a bolt put through
a hole, which is clipped into the handle. This construction isn't very
massive, but sufficient.
Start
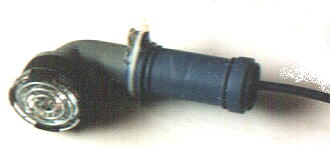
4th lighthead (tubing, resin)
During
a visit at a hardware store I bought some pieces more then I had in mind
and built presumably the most simple and cheap lighthead. I took a knee
tubing normally used at a washbasin and fixed a reflector bulb at the shorter
part. A reed contact is glued to the inside of the smaller part and connected
to a relais, the bulb and a cable. I didn't take an electronic because
they would emit warmth, which could bring trouble - see electronics. The
complete tube is filled with resin, which isolates the electrical parts.
Unreg it in a few steps. The bulb is fixed with some resin before and sealed
to the tube.
The bigger tube which should connect two smaller tubes serves as switch. A magnet is glued to it and secured with a cable tie. The sealings at the part hold it in place. Just push or rotate it for switching. The screen in front of the bulb isn't necessary but secures the bulb.
Of course you can't switch on the lighthead more then a short time out
of the water.
1st diving light | 2nd diving light | 3rd diving light | 1st accumulator | 2nd accumulator | 3rd accumulator | 4th accumulator | 5th accumulator | 6th accumulator | 1st lighthead | 2nd lighthead | 3rd lighthead | 4th lighthead